Seeing Exposure — Using the Histogram as a Creative Tool
Histogram exposure photography turns exposure into something you can verify in the field—so you stop guessing and start making calm, repeatable decisions.
Modern cameras give us bright screens, live previews, and instant playback—yet none of those can be trusted completely in changing light. This guide to histogram exposure photography shows you how to read the histogram as an objective truth-teller, so you can confirm exposure decisions in the field with confidence and consistency.
Why the Histogram Matters More Than the Screen
Camera LCDs are influenced by ambient light, brightness settings, and even your own visual adaptation. The histogram, however, is immune to those variables. It shows how captured tonal data is distributed from pure black to pure white—regardless of how bright or dim the image appears on screen.
In histogram exposure photography, the goal is not to create a “pretty” graph. Instead, it is to confirm that important highlight and shadow detail exists where you need it.
How to Read the Histogram Without Fear
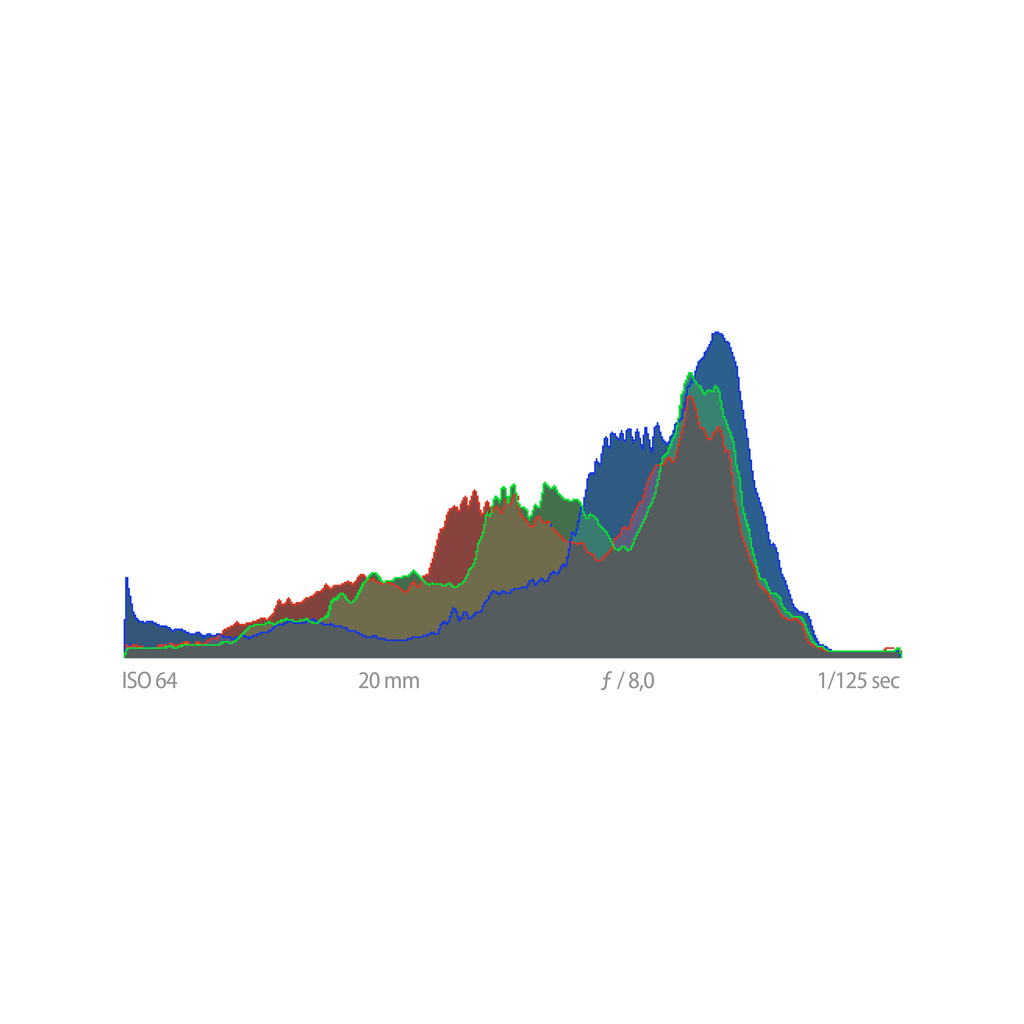
- Left edge: Shadow data. Piled up here can mean clipped blacks.
- Right edge: Highlight data. Piled up here can mean blown highlights.
- Middle: Midtones—often where subject detail lives.
A histogram is scene-dependent. High-key snow scenes push right; low-key night scenes push left. Neither is wrong. What matters is whether important detail is lost.
Highlight Protection vs Shadow Recovery
Digital sensors forgive shadows far more than highlights. Therefore, many photographers expose to protect highlights, allowing shadows to fall where they may—knowing RAW files can often recover them later.
- Clipped highlights = detail is usually lost forever.
- Dense shadows = often recoverable in RAW (with some noise cost).
- Use highlight warnings (“blinkies”) to confirm risk areas.
Using the Histogram in the Field
After a test frame, glance at the histogram before making another exposure. Ask:
- Are highlights touching the right edge?
- Are shadows unintentionally crushed?
- Does the tonal spread match the scene’s intent?
Adjust exposure compensation or manual settings accordingly, then reshoot immediately. Over time, this loop becomes fast—and your exposures become reliably repeatable.
Histogram Discipline Builds Creative Confidence
When you trust the histogram, you stop second-guessing the LCD. Your exposure decisions become calm, repeatable, and transferable between cameras. As a result, you free mental space for composition, timing, and emotion.
Continue in Create → View all Create posts
Jump to: Learn Envision Create
References
Concepts inspired by Light: Science and Magic, the Nikon D850 User Manual, and PhotoFovea Create workflow standards.
- Associated blog(s): Learn — Lesson 4: Exposure Triangle
- Associated blog(s): Create — Understanding Camera Exposure: Aperture, Shutter, ISO