Compositing for Photographers: Building Images Beyond a Single Exposure
Compositing for photographers is the disciplined craft of building a believable final image from multiple sources while preserving photographic credibility.
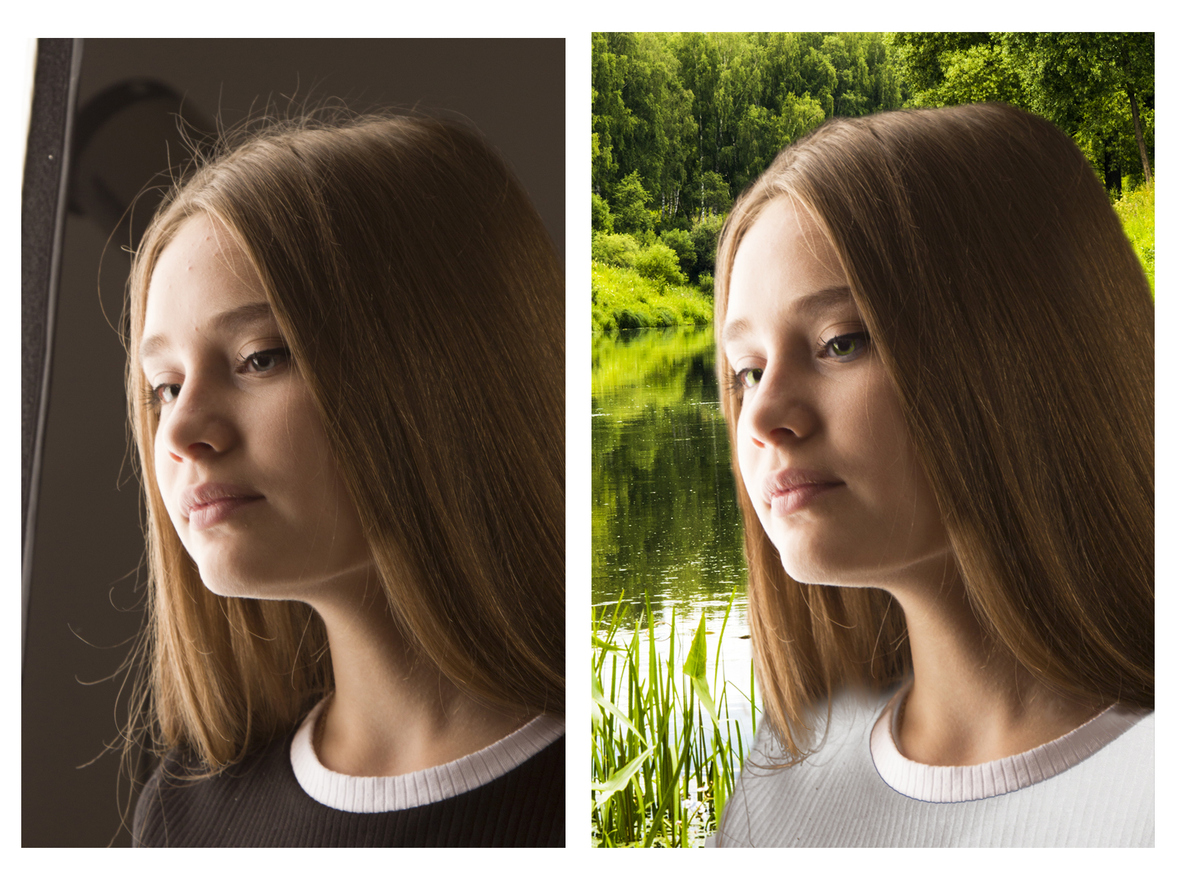
Why compositing begins before Photoshop
The strongest composites are not rescued in editing. They are planned. Before masks, layers, or color grading enter the process, the photographer must decide why the composite exists.
Is it solving a visual problem? Building a narrative? Extending an idea beyond what a single exposure could capture? Without that purpose, compositing becomes decorative assembly.
Compositing for photographers works best when every added element supports one unified visual idea. The goal is not to prove that many images can be combined.
The goal is to make the final image feel inevitable.
The four tests of a believable composite
- Perspective: camera angle, lens behavior, and scale must agree.
- Light: direction, softness, intensity, and shadow logic must feel consistent.
- Color: white balance, saturation, and tonal mood must belong to the same world.
- Depth: sharpness, blur, noise, and atmosphere must match spatial placement.
Compositing for photographers: a practical workflow
1) Start with the anchor image
Choose the image that establishes the visual world. This is usually the background or primary subject frame.
It sets the perspective, light direction, tonal range, and mood. Every additional element must adapt to this anchor.
2) Match perspective and scale first
Perspective errors are difficult to hide. If the camera height, focal length, or subject scale feels wrong, even perfect masking will not save the composite.
Align geometry before worrying about color or polish.
3) Build clean masks, then refine edges
Masks are the structural seams of a composite. A poor mask makes the added element feel pasted in.
Edge softness should match the photograph’s depth of field and focus behavior. Hair, fabric, foliage, and atmospheric edges need special care.
4) Match light and shadow logic
Light must agree across the frame. Shadows should fall in believable directions. Highlights should respond to the same implied source.
If an added object appears lit from the opposite side, the viewer may not know why it feels wrong—but they will feel it.
5) Unify color after the elements are placed
Color grading should come after integration, not before. First match contrast, exposure, and white balance between elements.
Then use a final grade to make the whole image share one emotional atmosphere.
6) Match grain, noise, blur, and sharpness
A composite can fail because one element is too clean, too sharp, too noisy, or too detailed for its location.
Texture behavior matters. Foreground and background elements should obey the same optical world.
Integrating compositing into a Smart Object workflow
Composite work should remain non-destructive. Keep source elements as separate layers or Smart Objects whenever possible.
Preserve masks, adjustment layers, and Smart Filters so the image can be revised without rebuilding the entire structure.
- Use Smart Objects for major source elements.
- Name layers clearly by role and source.
- Group related elements for navigation.
- Apply final grading above the integrated composite, not to each source in isolation.
Hands-On Practice (20 minutes)
- Choose one anchor image and one secondary element.
- Match scale and perspective before masking.
- Create a clean mask and refine the edge softness.
- Match exposure and contrast with Curves.
- Match color with Color Balance or Selective Color.
- Add a subtle final grade to unify both elements.
Quick Check
- Does the added element share the same perspective as the anchor image?
- Do shadows and highlights follow believable light logic?
- Are edges clean without halos or hard cutouts?
- Does the final image feel like one photograph rather than assembled parts?
Continue in Create →
View all Create posts
Jump to:
Learn
Envision
Create
References
-
Adobe Photoshop User Guide — Layers.
Open -
Adobe Photoshop User Guide — Masks.
Open -
Associated blog:
Masking Mastery for Photographers -
Associated blog:
Final Image Workflow for Photographers
🌿 Download the Compositing for Photographers Checklist (.docx).